 Here is me with no makeup…
If you are like me, I like to look as natural as possible, while still cover up spots, pimples, dark circles, redness, and scarring. So really I prefer to look naturally flawless! lol
This step by step tutorial will show you how to cover up skin imperfections. By creating that perfect base, without looking overdone.
Note that makeup can cover colour, but it does NOT change the texture and appearance of your skin. I would always recommend a great skin care routine.
Also before you start, my rule when using product is ” Less is more ”
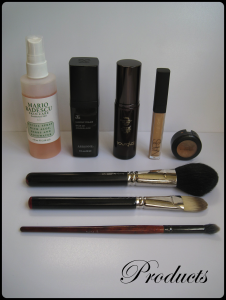
Products (from left to right):
- Mario Badescu facial spray
- Arbonne Makeup Primer
- Hourglass Veil Fluid Foundation in No/4 Beige
- NARS Radiant creamy concealer in Ginger
- MAC Cosmetics Studio finish concealer in NC42
- MAC Prep and Prime finishing powder (sorry not in the photo)
Brushes
- MAC Cosmetics Powder brush #150
- MAC Cosmetics Foundation brush #190
- Pupa small fluffy brush equivalent to #224 MAC brush
- James Starks Jersey
- NFL Nike Bryan Bulaga Jersey
- NFL Bryan Bulaga Jersey
- Nike Bryan Bulaga Jersey
- Bryan Bulaga Jersey
- Nike Casey Hayward Jersey
- NFL Nike Casey Hayward Jersey
- NFL Casey Hayward Jersey
- Casey Hayward Jersey
- Quinten Rollins Jersey
- NFL Nike Quinten Rollins Jersey
- NFL Quinten Rollins Jersey
- Quinten Rollins Jersey
- Clay Matthews Jersey
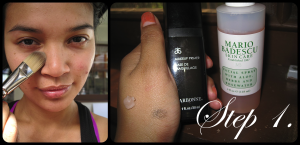 Step 1. Prepare your skin for makeup
- I have already cleansed and moisturised my skin
- Rehydrate the skin with a hydration mist. This allows your makeup to glide on, and it helps your makeup last longer. My favourite at the moment is Mario Badescu facial spray. It suits all skin types, and smells wonderful!
- Next prime your skin with your chosen primer. I was given this Arbonne primer as a gift, it’s silicone based so it leaves your skin feeling smooth. I have lots of primers, and to be honest this one wasn’t top on my list, but it gives you a nice finish. Your skin type will determine what primer you should be using.
- Start by applying the primer from the centre of the face (T-zone) and work your way out. Your T-zone is where makeup tends to move out of place, thats why I suggest to prime there and work your way out, to avoid too much product build up.
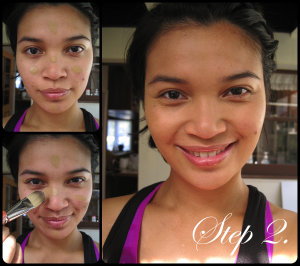 Step 2. Apply your foundation
- Dot on your foundation in the areas that you will need to cover up the most. I’m LOVING my new Hourglass Veil Foundation, medium coverage with anti-ageing benefits! I will be doing a review of this foundation soon.
- Spread it out using your foundation brush, using a downwards stroke. We have tiny little hair on our face so you want to be smoothing them out, not lifting them up!
- Tip: Pat in areas that need more coverage e.g under the eyes and spots, or if your foundation seem to be streaking.
- Add another layer if needed. There is 1 layer of foundation all over my face, with a small additional pump on the problem areas.
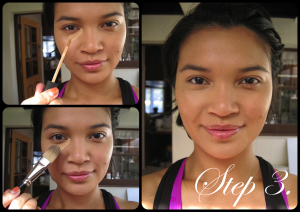
Step 3. Conceal problem areas
- Apply concealer to any area that is dark, red or spotty. You can see the difference between my left and right eye. I have applied concealer to one, and not the other. Can you see the difference?
- Blend the concealer by pressing it into place. This method avoids you moving the concealer out of place.
- Tip: Depending on how dark you are around the eyes, you many need to have 2 different coloured concealers. Otherwise instead of covering up the area it will look grey. The colour of your concealer is more important the amount of coverage it can give you.
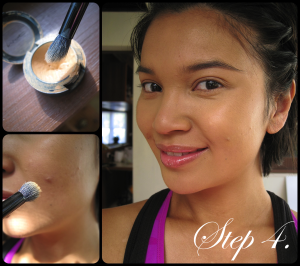
Step 4. Crank out the heavy duty concealer (if needed)
- Using a fluffy brush gently dab on spots and harder to conceal areas. I had an annoying pimple the other day and instead of applying a heavy concealer all over I used studio finish concealer and focused on just the spot, I also buffed a bit onto my scarring on my other cheek.
- Tip a fluffy brush will apply less product and will blend the concealer evenly.
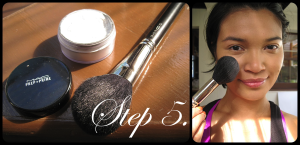 Step 5. Set your makeup
- Apply a small amount of powder with a fluffy brush to the whole face, concentrating on the areas that will move the most. ie. T-zone
- Tip: Even if you have dry skin it’s still good to apply a very small amount of powder in areas that will tend to move.
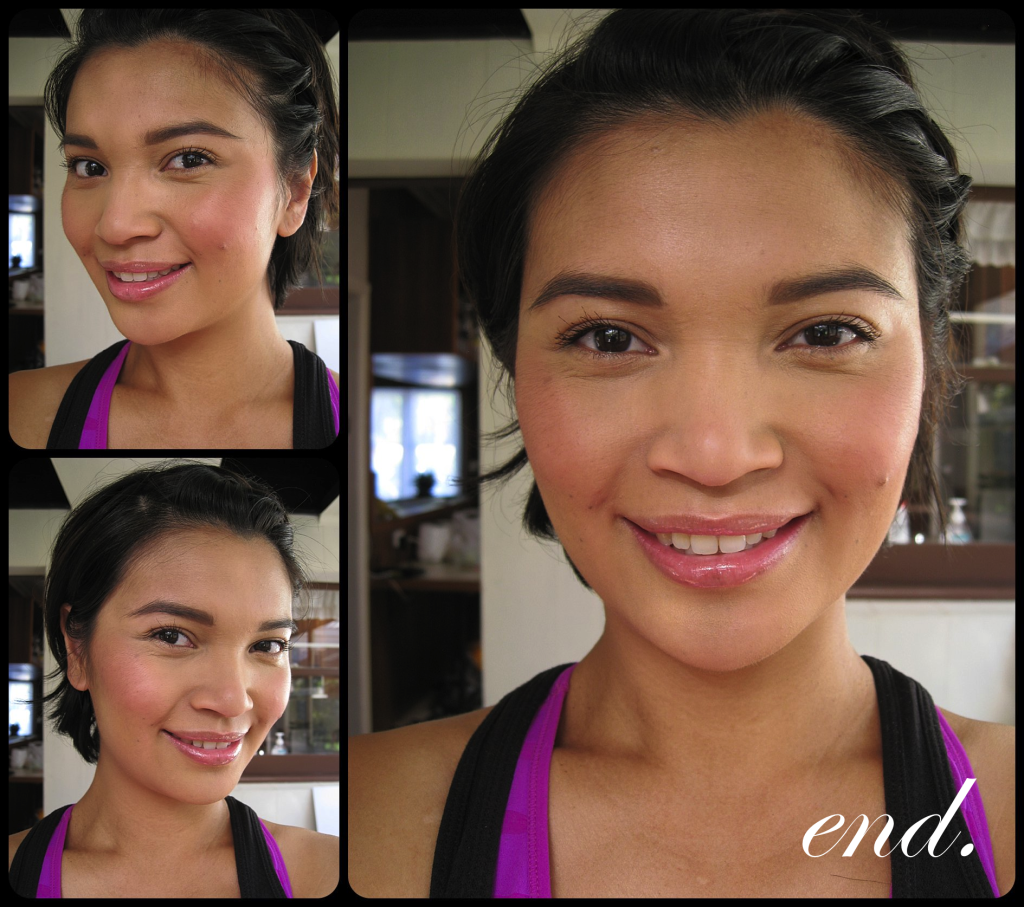
Here is the end result. I have just added blush, mascara, lipgloss and drawn in my eyebrows for a complete look. As you can see you can still see the bump of my pimple, and probably some fine lines. http://www.justineo.com/how-to-cover-up-skin-imperfections/ http://www.justineo.com/how-to-cover-up-skin-imperfections/ http://www.justineo.com/how-to-cover-up-skin-imperfections/Which you cannot hide.
You need to remember that everything in magazines have been retouched to look like they have perfect skin.
I say love the skin your in, makeup to me is fun, and it’s about enhancing what you’ve got.
I hope you’ve enjoyed this post. Feel free to leave your comments below, and if you have anything that you wish for me to cover in a blog post let me know.
Till next time!
Love,
Justine